Set the ilo 4 Security Override Switch on the system board to the ON position. The location of the switch is printed on a label located on the inside of the server blade hood cover. On the same maintenance switch, set switch number 3 to the ON position.
Download the Smart Update Firmware Maintenance DVD version 9.10 B and later.
Create a bootable USB key containing the contents of the Smart Update Firmware DVD.
Download the desired version of the ilo 4 firmware smart component for Linux (cp0xxxxx.scexe where xxxxx is an appropriate 5 digit number).
Copy the downloaded ilo 4 firmware to the directory /hp/swpackages on the USB key.
Put the server blade back into the enclosure and power the server blade ON. Boot to the USB key containing the Smart Update Firmware DVD and select interactive firmware update.
Use the following key sequence to exit out of the Smart Update Firmware Maintenance DVD interface. A command prompt will be displayed: CTRL + ALT + d + b + x (Keep the CTRL and ALT keys pressed when typing d b x. ) The command prompt takes approximately 30 seconds to be displayed.
At the command prompt, navigate to the Smart Update Firmware DVD directory containing the supplemental ilo 4 firmware update by using the following command: bash-3.1# cd /mnt/cdrom/hp/swpackages
Use the following command to unload the HPILO module: rmmod hpilo
Use the following command to execute the ilo 4 firmware update in direct mode: sh cp0xxxxx.scexe – – direct (This parameter requires two dash ( ) characters.).
After the ilo 4 firmware upgrade is completed, power the server blade OFF and set the ilo 4 Security Override Switch on the system board to the OFF position. On the same maintenance switch, set switch number 3 to the OFF position
On an HPE Gen8-series or HPE ProLiant Gen9-series servers with HPE Integrated Lights-Out 4 (iLO 4), the NAND flash device may not initialize or mount properly, which may cause a variety of symptoms, which are listed below:
AHS Errors
AHS Logs display a blank date when performing the following: “Select a range of the Active Health log in days From: _______ To:_________” AHS file system mount may fail with (I/O Error) or (No Such Device).
The HP Active Health System (AHS) Logs are unable to be downloaded. AHS Data is not available due to a filesystem error.
The iLO Diagnostic tab will display the following error message: “Embedded media manager failed initialization” or “The AHS file system mount failed with (No such device) or “The AHS file system mount failed with (I/O error)” or “Controller firmware revision 2.09.00 Could not partition embedded media device.”
Unable to download AHS log and “bb_dl_disabled” is displayed.
Embedded Media Errors
Controller Firmware Version 2.09.00 may fail to restart.
Unable to partition Embedded media device.
Embedded media manager may fail initialization.
Intelligent Provisioning Errors
Intelligent Provisioning will not execute when selecting F10.
Unable to register this HP OneView instance with iLO: There was a problem with posting a command to the iLO.
Unable to register this HP OneView instance with iLO: The iLO initialization was unable to complete.
Unable to determine if this server hardware is being managed by another management system. Received an error from iLO <ip address of iLO> with Error: Blob Store is not yet initialized. and Status: 126
SCOPE
Any HPE ProLiant Gen8-series or HPE ProLiant Gen9-series server running iLO 4.
RESOLUTION
The resolution for this issue may take several steps that need to be completed in the order specified below.
OVERVIEW
Step 1) Upgrade the iLO 4 firmware to version 2.61 Step 2) Perform a NAND format Step 3) Check the iLO status If the iLO status is normal, then skip to Step 6 If the iLO status is still degraded, continue to Step 4 Step 4) Schedule downtime; AC power-cycle and repeat the NAND format Step 5) Check the iLO status If the iLO status is normal, continue to Step 6 If the iLO status is still degraded, then skip to Step 7 Step 6) Perform these final steps if the system board does not need to be replaced: Reboot the server; reinstall IP; and refresh the server in OneView (if server is managed by OneView) Step 7) If steps 1-4 did not resolve the degraded iLO, replace the system board.
Note: The 2.61 iLO 4 firmware is a critical update. As such, HPE requires users to update to this version immediately. Install this update to take advantage of significant improvements to the write algorithm for the embedded 4 GB non-volatile flash memory (also known as the NAND). These improvements increase the NAND lifespan.
Additional considerations before performing a NAND format
A NAND format can be performed while the server is online in most cases.
Exception: For ESXi hosts booting from the Embedded SD Card – it isstrongly recommended to perform the NAND format with the ESXi OSshutdown.This recommendation also applies when updating the iLO 4firmware or resetting the iLO for ESXi hosts booting from the Embedded SDCard
A server AC power removal may be required (prior to the NAND format) in order for the NAND format to be successful. This can be accomplished for ML or DL servers by shutting down the server and disconnecting the power cables for a few seconds. For blade servers, an E-fuse can be accomplished by logging into the OA CLI and typing “reset server #” where “#” is the bay number of the blade.
An AuxPwrCycle feature was added in iLO 4 firmware version 2.55 so that the equivalent of an AC power removal can be performed remotely on a server. Refer to Customer Notice “HPE Integrated Lights Out (iLO) 4 – RESTful Command to Allow an Auxiliary Power-Cycle Is Available in Firmware Version 2.55 (and Later)” located at the following URL:
Required steps to perform after a successful NAND format
If the server is powered on when performing the NAND format, a server reboot is required after a successful NAND format. This reboot repopulates the RIS and RESTful data on the server during the next server POST with iLO 4 firmware version 2.53 or newer installed. If iLO 4 firmware version 2.50 or older is installed, connect to the iLO CLI (using putty) and use the following command “oemHP_clearRESTapistate” before rebooting the server to repopulate the RIS and RESTful data on the server.
Reinstall Intelligent Provisioning (IP) to ensure that it is working properly and reported as installed in the iLO 4 GUI “System Information – Firmware Information” page.
If using OneView: After the server is rebooted (to repopulate the RIS and RESTful data on the server), perform a server refresh in OneView; any existing errors in OneView will need to be marked as cleared after the refresh.
Detailed steps
Step 1. Upgrade the iLO 4 firmware to version 2.61. To download the firmware. The latest version of the iLO 4 firmware is available as follows:
Note: For ESXi hosts booting from the Embedded SD Card (Gen8/Gen9)- it is strongly recommended to perform this step with the ESXi OS shutdown.
Enter a product name (e.g., “DL380 Gen9”) in the text search field and wait for a list of products to populate. From the products displayed, identify the desired product and click on the Drivers & software icon to the right of the product.
From the Drivers & software dropdown menus on the left side of the page:
Select the Software Type – (e.g. Firmware)
Select the Software Sub Type – (e.g. Network)
For further filtering if needed – Select the specific Operating System from the Operating Environment.
Select the latest release of Firmware – Lights-Out Management iLO 4 firmware version 2.61 (or later). Note: To ensure the latest version will be downloaded, click on the Revision History tab to check if a new version of the firmware/driver is available.
Click Download.
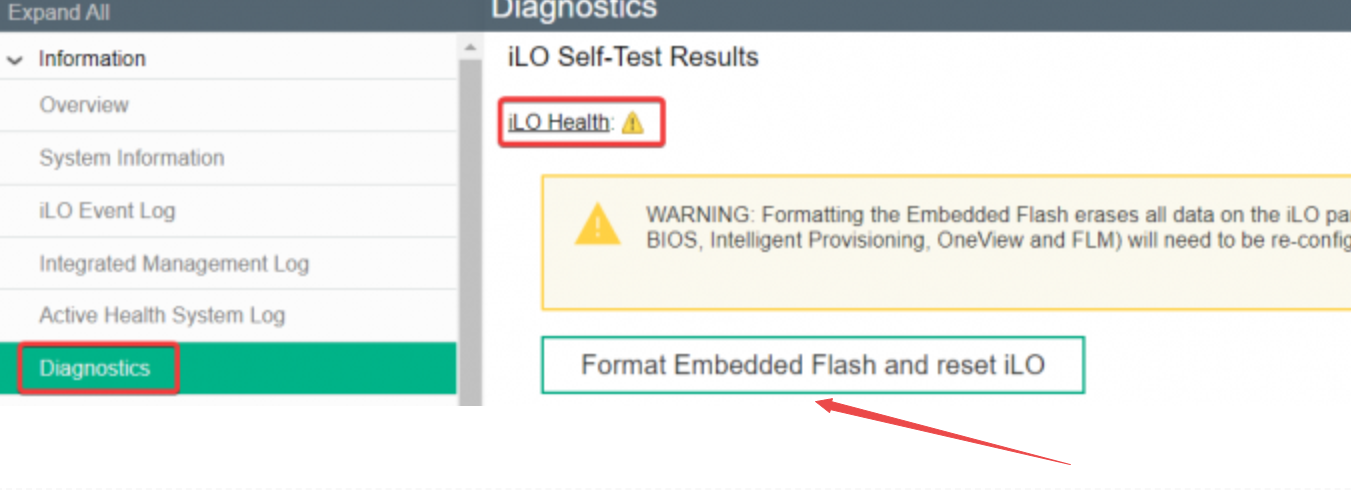
Step 2. Perform NAND format using one of the methods detailed in the customer advisory: using one of the methods detailed in the customer advisory: HPE Integrated Lights-Out 4 (iLO 4) – How to Format the NAND Used to Store AHS logs, OneView Profiles, and Intelligent Provisioning Find the document at:
Note: iLO 4 firmware version 2.44 (or later) is required to format the NAND using the following steps.
Step 3. Check the iLO status using the options available in the customer advisory: HPE Integrated Lights-Out 4 (iLO 4) – How to Format the NAND Used to Store AHS logs, OneView Profiles, and Intelligent Provisioning (find the document at the link in Step 2).
If the iLO status is normal based on the above criteria, then skip to Step 6 If the iLO status is still degraded, continue to Step 4
Step 4. If the iLO status is still degraded, perform the following steps:
a) Schedule a maintenance window b) Shut down the server c) Perform an E-fuse (server blade) or AC Power Pull (DL / ML series servers) d) Perform the NAND format again (refer to the instructions in Step 2 above)
Step 5. Check the iLO status (refer to the instructions in Step 3 above) If the iLO status is normal, continue to Step 6 If the iLO status is still degraded, then skip to Step 7
Step 6. Perform these final steps after the NAND format is successful: a) Reboot the server b) Reinstall Intelligent Provisioning (see additional details below) c) If the server is managed by HPE OneView, perform a server refresh to bring the server back under management.
Note: Any existing errors in OneView will need to be marked as cleared after the refresh.
Step 7. If steps 1-4 did not resolve the degraded iLO, contact HPE support to arrange a system board replacement. Follow these steps to complete the remediation:
a) Open an HPE support case to arrange for a replacement system board / arrange a maintenance window b) During the maintenance window, shutdown the server c) Unassign the OneView profile (if the server is under OneView management) d) Replace the system board e) Enter Server Model and Serial Number via RBSU f) Update to iLO 4 firmware 2.61 (or later) g) Check iLO status (refer to Step 3 above) h) Reassign the OneView profile (if the server is under OneView management)
Note: Any existing errors in OneView will need to be marked as cleared after the OneView profile is applied.
If additional assistance is needed, contact HPE support and reference Advisory a00019495en_us as follows:
Click on the following URL to locate the HPE Customer Support phone number in your country:
OneView relies on the NAND to be accessible to perform many operations such as adding a new server or applying a profile. Because of this there are several things that need to be understood when dealing with this issue in an OneView environment.
OneView interaction with the NAND – OneView uses a portion of the NAND called the iLO blob store. If the blob store is not accessible, adding a server to OneView or assigning a profile to the server cannot be completed.
Impact of an inaccessible NAND when managed by OneView – If the NAND becomes inaccessible after the server was added in OneView, there are several things that can cause an outage:
E-fuse – If an E-fuse reset is performed, the server will not be able to be brought back under management until the NAND issue is remediated and this will cause an unexpected outage.
Server is removed and reinserted – This would essentially be the same as performing an E-fuse, so the same information in the E-fuse section applies here.
Un-assign a server profile – If a server profile is unassigned, the server profile will not be able to be reassigned until the NAND issue is remediated.
Migration from Virtual Connect to OneView – If an enclosure is migrated from Virtual Connect and a server has an inaccessible NAND, that server will not be able to be added properly until the NAND issue is remediated. If an in-service migration is attempted on a server with an inaccessible NAND, an unexpected outage will occur. Reference advisoryhttps://support.hpe.com/hpsc/doc/public/display?docId=emr_na-c05384185for more detail.
Formatting of the NAND – The NAND format wipes the iLO blob store that is used by OneView. It is important to issue a server refresh after a successful NAND format to recover the blob that OneView uses.
There are online and offline options for reinstalling Intelligent Provisioning
Intelligent Provisioning can be reinstalled online if the server is running Windows (HPE ProLiant Gen8-series servers/HPE ProLiant Gen9-series servers only) or Linux (HPE ProLiant Gen8-series servers/HPE ProLiant Gen9-series servers). The available online Windows packages are older versions of Intelligent Provisioning.
Intelligent Provisioning must be reinstalled offline if the server is running VMware (HPE ProLiant Gen8-series servers/HPE ProLiant Gen9-series servers).
The Intelligent Provisioning software download links are provided below. Intelligent Provisioning versions
HPE ProLiant Gen8-series servers are only supported with Intelligent Provisioning 1.x
” HPE ProLiant Gen9-series servers are only supported with Intelligent Provisioning 2.x
Note: Intelligent Provisioning version 3.x is for HPE ProLiant Gen10-series servers only.
Offline method considerations:
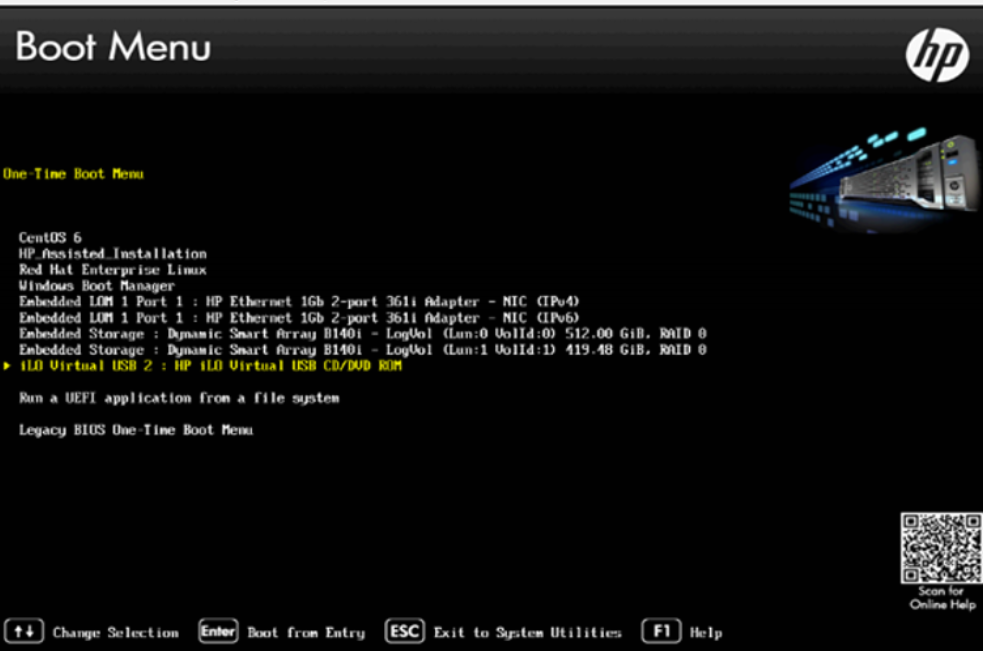
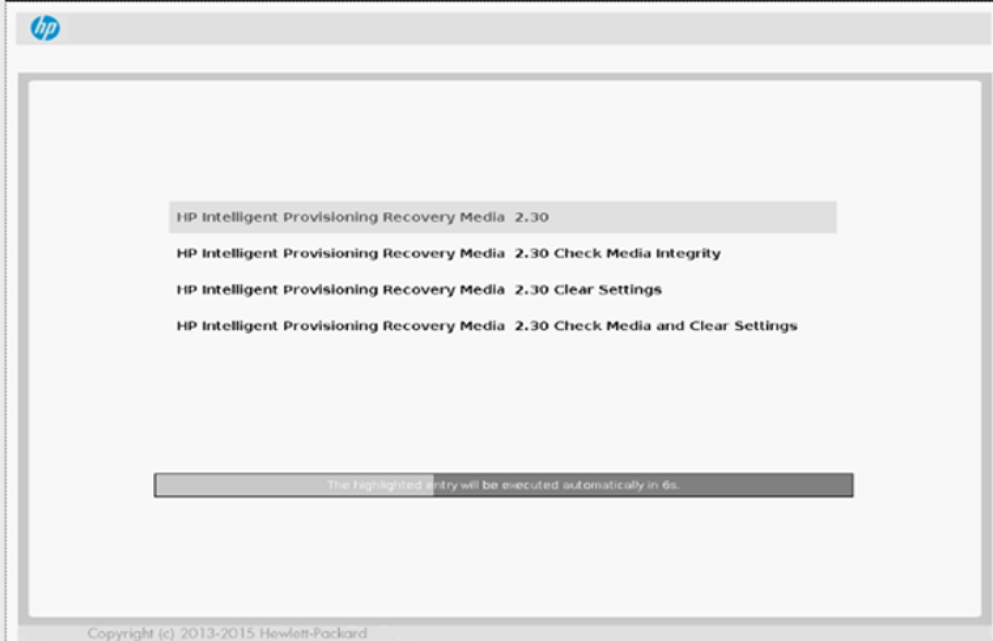
Run the Intelligent Provisioning Restore Media to restore the Intelligent Provisioning data. Instructions to restore Intelligent Provisioning are as follows:
Instructions to create a bootable DVD with the IP image are provided on the HPE Intelligent Provisioning recovery media download site under the Installation Instructions tab.
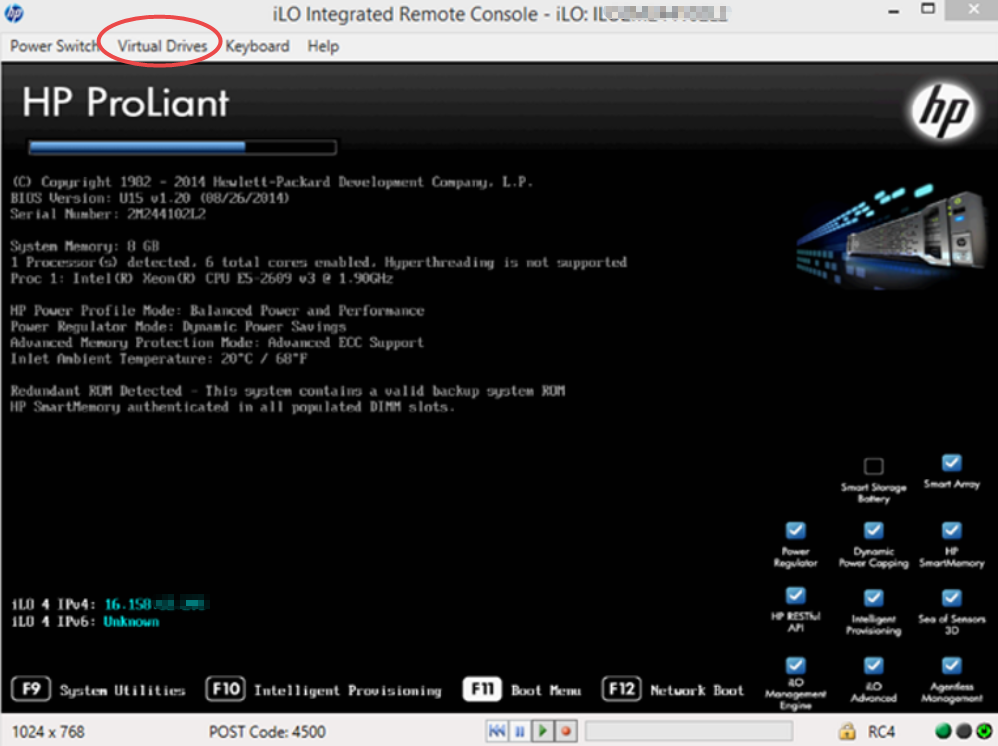
Please note the Intelligent Provisioning Recovery Media DVD may be remotely mounted using HPE Integrated Lights-Out 4 (iLO 4) Virtual Media functionality, in order to reinstall Intelligent Provisioning. Additional information is available in the HPE iLO 4 User Guide at the following URL regarding how to mount an ISO image (federated or un-federated) and perform basic virtual media operations. Reference Pages 189 and 223-237:
In addition, it is possible to write a script that utilizes HPE Integrated Lights-Out 4 (iLO 4) to reinstall Intelligent Provisioning on multiple servers. HPE Lights-Out management processors support an advanced scripting interface for group configuration and server actions. Scripts would need to be customized for the specific environment and task. Sample scripts are available for customers to reference at the following URL: HPE Lights-Out XML Scripting Sample for Windows: https://support.hpe.com/hpsc/swd/public/detail?swItemId=MTX_459b8adc29c04317ad1d6a6752
Intelligent Provisioning software download links
HPE ProLiant Gen8-series servers are only supported with Intelligent Provisioning 1.x HPE ProLiant Gen9-series servers are only supported with Intelligent Provisioning 2.x
For HPE ProLiant Gen8-series servers: Intelligent Provisioning Recovery Media, version 1.70(9 Oct 2017) For HPE ProLiant Gen9-series servers: Intelligent Provisioning for Gen9 Servers, version 2.70(b)(28 Feb 2018)
This package requires a build environment. Please refer to the “Build Environment Setup” Section before proceding to the next step.
Install the source RPM package. rpm -ivh hp-e1000e-.src.rpm
Build the binary RPM for the e1000e driver. RHEL 5: rpmbuild -bb /usr/src/redhat/SPECS/hp-e1000e.spec RHEL 6: rpmbuild -bb ~/rpmbuild/SPECS/hp-e1000e.spec SLES: rpmbuild -bb /usr/src/packages/SPECS/hp-e1000e.spec If you get an error during the build process, refer to the “Build Environment Setup” section. NOTE: One can build binary RPM for a specfic kernel flavor as follows: rpmbuild -bb SPECS/hp-e1000e.spec –define “KVER ” NOTE: RHEL 5 x86 installations require the “–target” switch when building on Intel compatible machines. Please see the “Caveats” section below for more details. rpmbuild –target=i686 -bb /usr/src/redhat/SPECS/hp-e1000e.spec
Check for the existence of a current version of the e1000e package as follows: RHEL rpm -q kmod-hp-e1000e- SLES rpm -q hp-e1000e-kmp- If an old version of the package exists, the RPM package should be removed. Remove the corresponding tools package before removing driver package. RHEL rpm -e kmod-hp-e1000e- SLES rpm -e hp-e1000e-kmp- Verify if the old hp-e1000e package has been removed as follows: RHEL rpm -q kmod-hp-e1000e- SLES rpm -q hp-e1000e-kmp-
Install the new binary RPM package. RHEL 5 rpm -ivh \ /usr/src/redhat/RPMS//kmod-hp-e1000e–..rpm RHEL 6 rpm -ivh \ ~/rpmbuild/RPMS//kmod-hp-e1000e–..rpm The modules are installed in the following directory: /lib/modules//extra/hp-e1000e Note: The “–nodeps” switch is required when installing on RHEL 5.5. See “Caveats” section below for more details. rpm -ivh \ /usr/src/redhat/RPMS//kmod-hp-e1000e–..rpm –nodeps SLES rpm -ivh RPMS//hp-e1000e-kmp–..rpm The modules are installed in the following directory: /lib/modules//updates/hp-e1000e
Configure your network setting and address. You may need to refer to your Linux vendor documentation. Helpful network configuration tools such as “yast2” in SLES or linuxconf/redhat-config-network/netconfig in Red Hat exist for easy configuration.
For SLES, user may have to specify the module as e1000e while configuring the network. The module can be specified in Hardware Details of Advanced configuration
Ensure that the /etc/modules.conf file is configured similar to the example listed below. The example below is presented as if more than one adapter is present. If so, one eth# instance should exist for each ethernet port. Refer to the modules.conf man page for more information. alias eth0 e1000e alias eth1 e1000e
For SLES, the configuration file is /etc/modprobe.conf or /etc/modprobe.conf.local
You can now reboot your server or restart the network services. Upon reboot the network should start with the e1000e driver loaded
To verify that the e1000e driver is loaded use the following command.
# lsmod
You should find e1000e listed. You can also verify if the correct e1000e driver is loaded through any of the following methods. Note that version of the driver loaded should be same as that of the package version.
A. Look for driver load messages in the system log.
#dmesg | grep Intel
You should see messages of the following type,
Intel(R) PRO/1000 Network Driver - version x.x.x
B. Check the /var/log/messages file for a similar message as indicated in method A.
Note: To load the driver from command line use ‘modprobe’ instead of ‘insmod’. Refer to the man pages for lsmod, ifconfig, rmmod, insmod, modprobe, modules.conf and modprobe.conf for more detailed information.
Uninstalling the RPM
The following command will uninstall the RPM.
Red Hat
# rpm -e kmod-hp-e1000e-<kernel flavor>

SLES
# rpm -e hp-e1000e-kmp-<kernel flavor>
Limitations
Some Linux distributions may not add the default route back to a specified network device when a network stop/start command is used. Use the route command to add the default router back to the network device.
Some Linux distributions may not add the default assigned IP address back to a specified network device when using the following:
ifconfig eth(x) down
rmmod <module name>
insmod <module name> <optional parameter changes>
ifconfig eth(x) up
Another step to reassign the IP address back to the device may be required:
ifconfig eth(x) <ip address>
Some Linux distributions may add multiple IP addresses with the same system name in the /etc/hosts file when configuring multiple network devices.